Table of Contents
Introduction
In this guide we’ll install WordPress in just a few clicks with 1&1 IONOS web hosting. We’ll also install a theme and add plugins for security and SEO.
You’ll need to create an IONOS account and add a hosting package if you don’t have one already. You can choose one of their WordPress hosting packages or one of their Linux hosting packages. The hosting packages include a domain name for one year, but you can skip registering a domain name if you have one already.
Installing WordPress on IONOS
Before starting the WordPress installation wizard, decide on the domain or subdomain name that you want to use for the WordPress application. Create your subdomain if you haven’t already. If your domain name is registered with a registrar other than IONOS, connect it to your IONOS account.
In the ‘Domains & SSL’ section of your IONOS account, check that your domain name is on your hosting package. If it isn’t, you can move it to your hosting package.
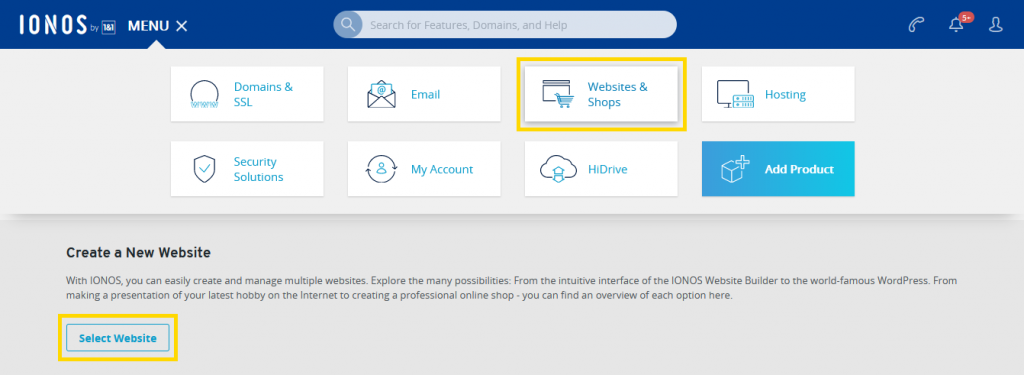
After adding the hosting package to your IONOS account, we can start installing WordPress. Go to ‘Websites & Shops’ from the main menu. Under ‘Create a New Website’, click the ‘Select Website’ button.
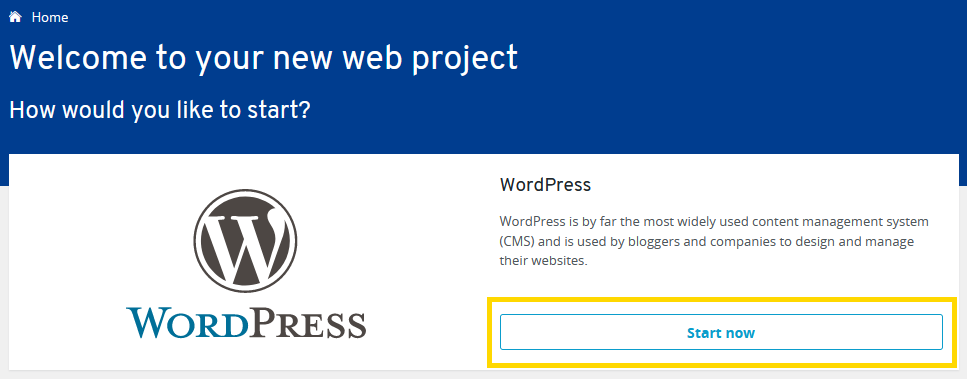
Choose WordPress from the list of available project types.
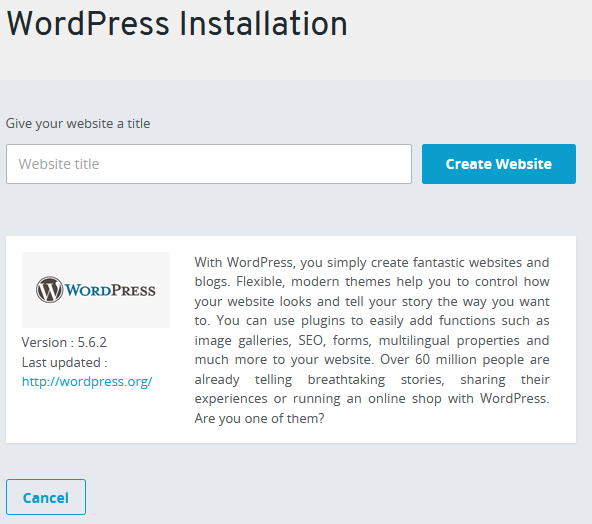
Enter a name for your website and click ‘Create Website’.
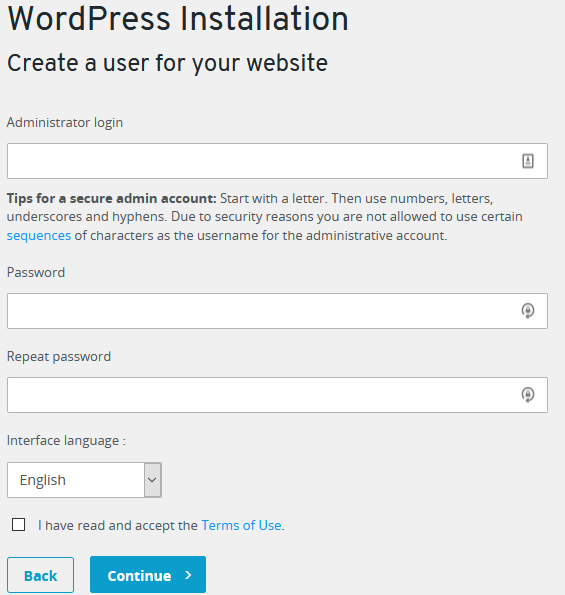
Next, enter a username and password for the WordPress admin account.
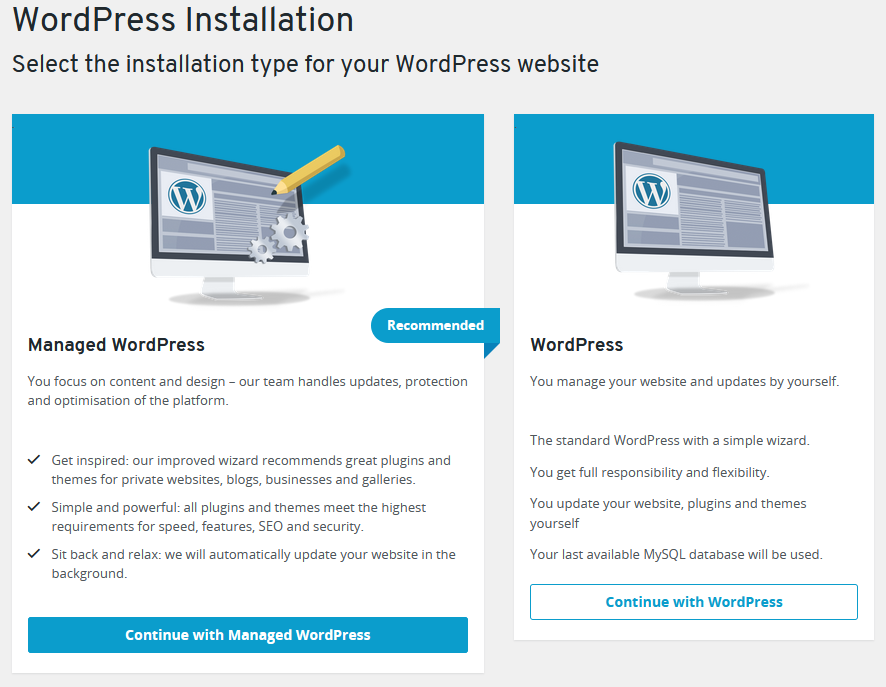
Now we can select the type of WordPress installation, managed or standard. We’re going to go with standard since not all plugins and customisations to the WordPress installation are possible with the managed version. The standard version of WordPress can still automatically update plugins, themes and WordPress itself (WP-Cron runs on each page load and checks for updates, a cron job can be created to call wp-cron.php).
Next, select the domain name to use.
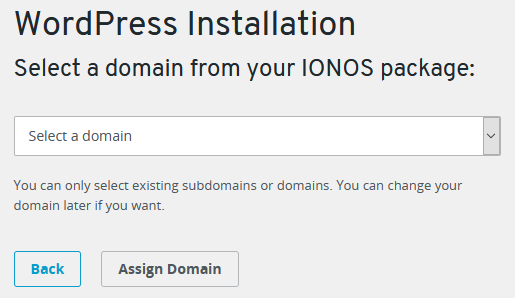
If your domain name isn’t appearing in the list, it may not be added to your WordPress hosting contract. If you go to the ‘Domains & SSL’ section of your IONOS account and select your domain name you can see which contract the domain name is on. There may be an option here to ‘Transfer Domain to Another Contract.’ If your domain name is an external one (with another registrar) that you’ve added to IONOS, you may need to remove the domain and choose your WordPress contract in the Contract Selection dialogue when re-adding the domain.
After selecting a domain, wait for the WordPress installation to complete.
Customise WordPress
Now we’ve completed the install of WordPress on IONOS we can customise WordPress and add posts.
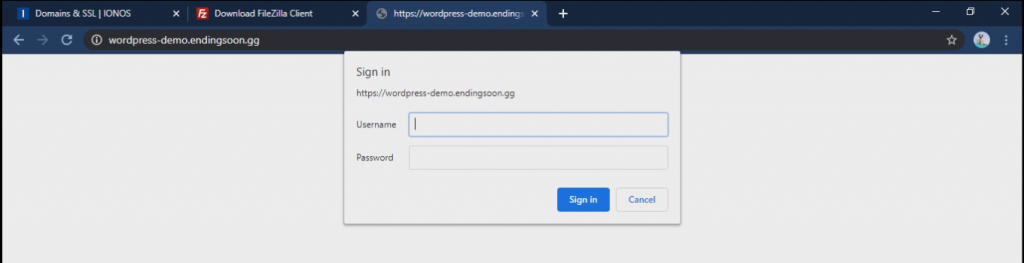
Go to the admin section of your WordPress application by adding ‘/admin’ to the domain name your selected when installing WordPress. If the domain you selected was blog.mydomain.com, go to blog.mydomain.com/admin in your web browser. Login with the username and password you set when installing WordPress.
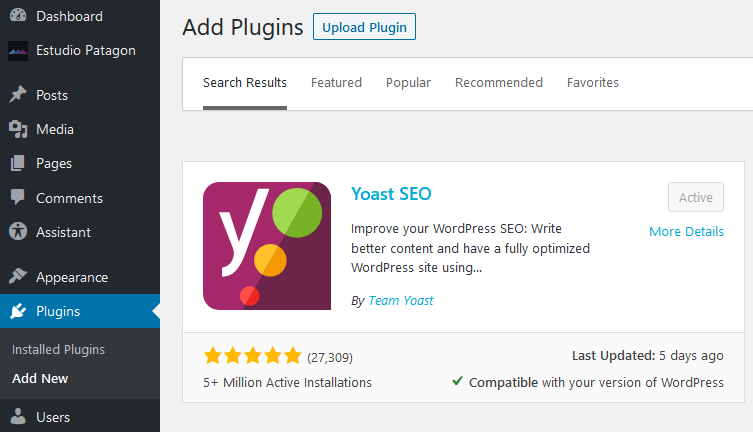
From the WordPress admin menu, navigate to Plugins -> Add New. Install and activate the following plugins:
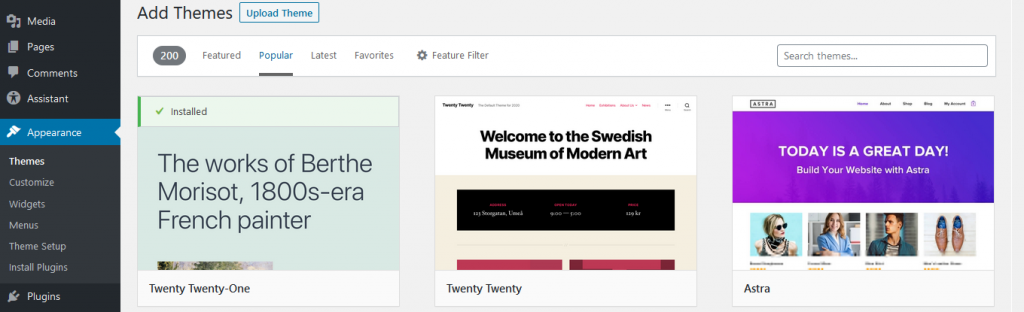
Go to Appearance -> Themes from the admin menu to select or upload a theme.
Secure WordPress
Follow the tips on this page to increase the security of your WordPress application.
You can add HTTP Basic Authentication to your WordPress admin area so that two logins are required to access it. Follow this guide on the IONOS Help Centre for instructions. One of our previous blog posts has a quick method for generating the password that goes in the .htpasswd file.
📝Article last updated on February 9th, 2023