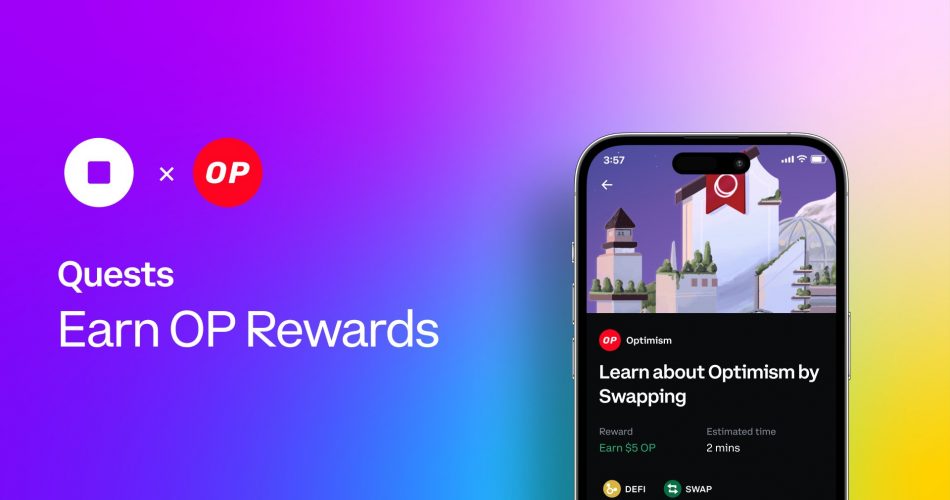
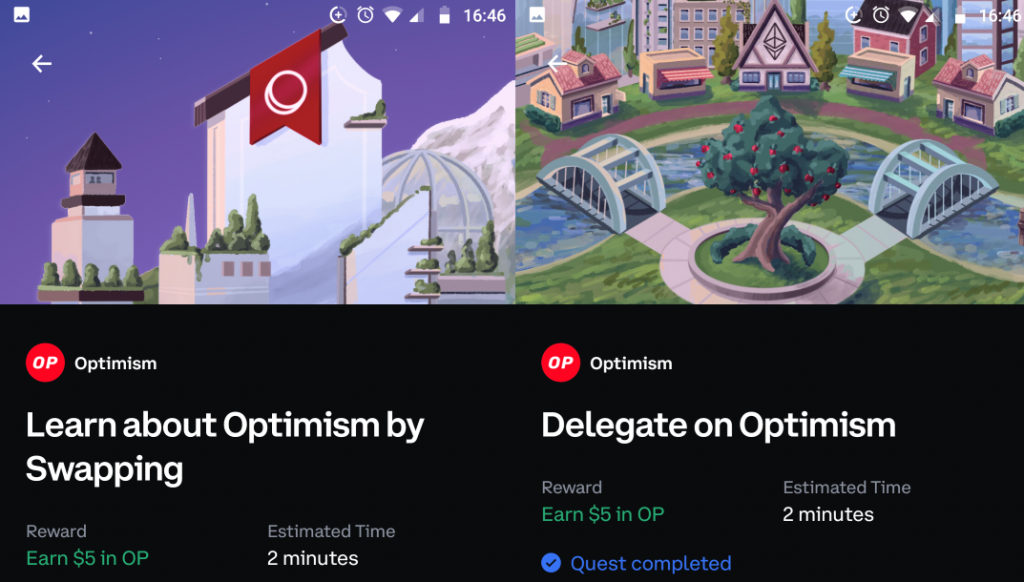
The Coinbase Wallet app has two quests (simple tasks) that you can complete to receive Optimism crypto rewards.
You’ll instantly be sent $5 in Optimism to your Coinbase wallet after completing each of the two quests (so $10 in total for completing both).
The total fees for me were about $2.60.
CONTENTS
- What You’ll Need
- How it Works
- Quest 1: Learn about Optimism by Swapping
- Quest 2: Delegate on Optimism
What you’ll need
- A Coinbase account (Sign up on their website: https://www.coinbase.com)
- The Coinbase Wallet app (download from iOS or Google Play app store)
- The Coinbase Wallet Chrome extension (to delegate Optimism for the second quest reward)
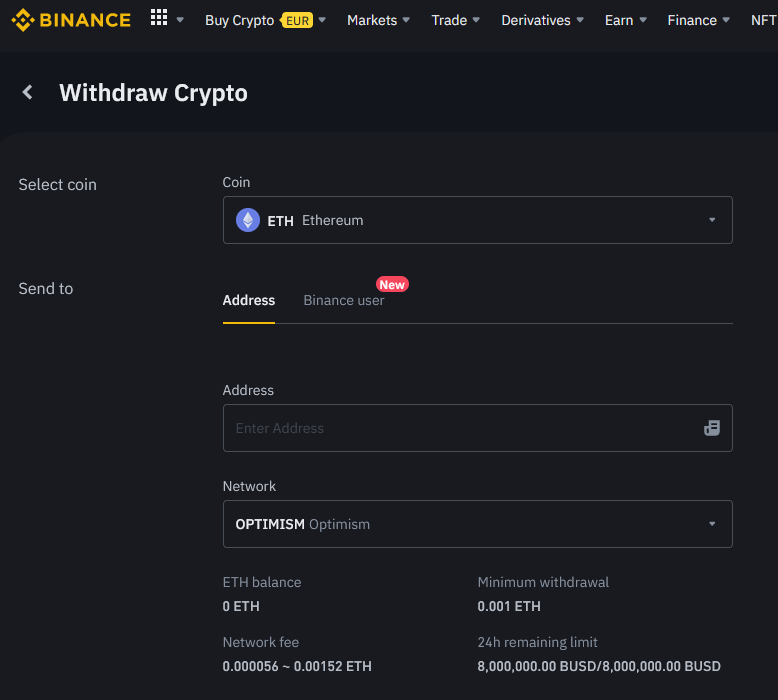
You’ll also need a small amount of Ethereum on the Optimism network in your Coinbase wallet. To get this I sent 0.0013 ETH ($2.40) from Binance but I think it will work with less. The fee for sending this amount from Binance to Coinbase wallet was 0.00035 ETH ($0.64).
The fee for the swap (to complete the first quest) was 0.00033 ETH ($0.60) – I swapped ETH to USDT.
How it Works
Here’s a quick overview of the steps:
- Add ETH on Optimism network to Coinbase wallet – I sent ETH from Binance (select Optimism network when withdrawing).
- Quest 1: Swap ETH in Coinbase wallet for USDT, USDC, DAI or WBTC.
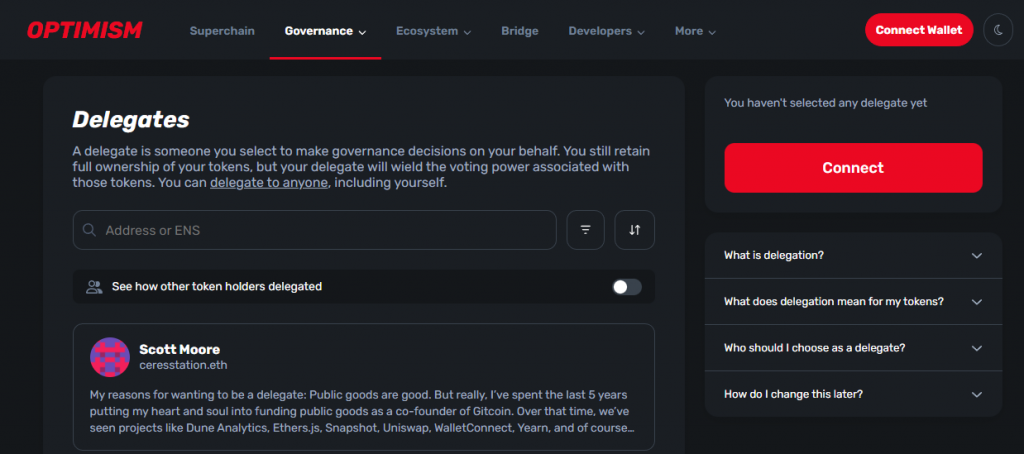
- Quest 2: Delegate Optimism (Visit https://app.optimism.io/delegates and connect your Coinbase Wallet using the Coinbase Wallet Chrome extension).
- (optional) Transfer Optimism, ETH, USDT etc from Coinbase wallet to Binance (this is if you want the money in your Binance account at the end).
Quest 1: Learn about Optimism by Swapping
Steps to Complete the first quest ‘Learn about Optimism by Swapping’:
- Open up the Coinbase wallet app and create the wallet if you haven’t done so already. This is simply a case of clicking to create the wallet and taking note of your recovery details.
- Go to the ‘Explore‘ tab in the app and click to start the first Optimism quest ‘Learn about Optimism by Swapping‘. You’ll be prompted to connect your Coinbase account. Enter your Coinbase username + password, then click to authorize Coinbase wallet.
- You need some ETH on the Optimism network in your Coinbase wallet. You can use any method to add it (see Coinbase Help: Fund your Wallet on Optimism), but I chose to send ETH from my Binance account (which I’ll explain in more detail here). Click to start the quest again and you have two options ‘Fund via Coinbase’ or ‘Transfer from another wallet‘. Select ‘Transfer from another wallet‘ and the address you need to send ETH to using the Optimism network will by copied to your clipboard.
- Login to Binance, go to Wallet > Fiat & Spot and select the Withdraw option for ETH (if you don’t have any ETH but have other crypto coins/tokens just select ‘Covert’ and convert a few dollars).
- On the Withdraw page, select ‘OPTIMISM‘ for the network and paste in the address that was copied to your clipboard by the Coinbase wallet app. When the ETH arrives in your Coinbase wallet simply swap some of it for USDT, USDC, WBTC or DAI via the app.
Quest 2: Delegate on Optimism
This quest is quicker than the first.
Steps to Complete the second quest ‘Delegate on Optimism’:
- Add the Coinbase wallet extension to Chrome web browser and login to your wallet.
- Go to https://app.optimism.io/delegates and click the ‘Connect Wallet‘ button.
- Select a person from the list to delegate to and approve the transaction.
You should receive the reward in the Coinbase wallet right after.