
In this guide, we’ll cover setting up a free cloud VPS server that you can use for your next project – whether that’s WordPress, a game server, forex trading, your own VPN or something else entirely. Unlike the AWS free tier, which is free for 12 months, the Oracle Cloud free tier includes some always free services which we’ll use in this guide.
CONTENTS
- Is Oracle Cloud really free?
- Create an Oracle Cloud account
- Create a Free Cloud VPS
- Connect to your Cloud VPS Server
- What can I use my Free Cloud VPS Server for?
Is Oracle Cloud really free?
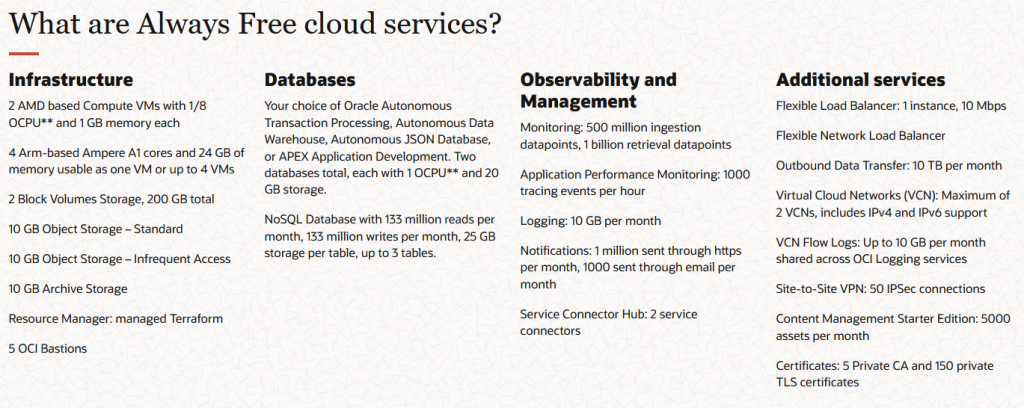
The Oracle Cloud free tier includes the always free services shown in the image below as well as US$300 credit to use on cloud services for 30 days.
The virtual machines covered in this guide are always free. You are not charged unless you manually choose to upgrade to a paid account. If you create any paid resources using the free credit and do not upgrade to a paid account, these resources will eventually be deleted. The always free resources continue to be accessible.
Create an Oracle Cloud account
Go here to sign up for Oracle Cloud free tier.
Create a Free Cloud VPS
After logging in to Oracle Cloud, click on ‘Create a VM instance.’

Enter a name for your virtual machine or go with the default name.

You can change the compartment and availability domain or leave them as their default setting.
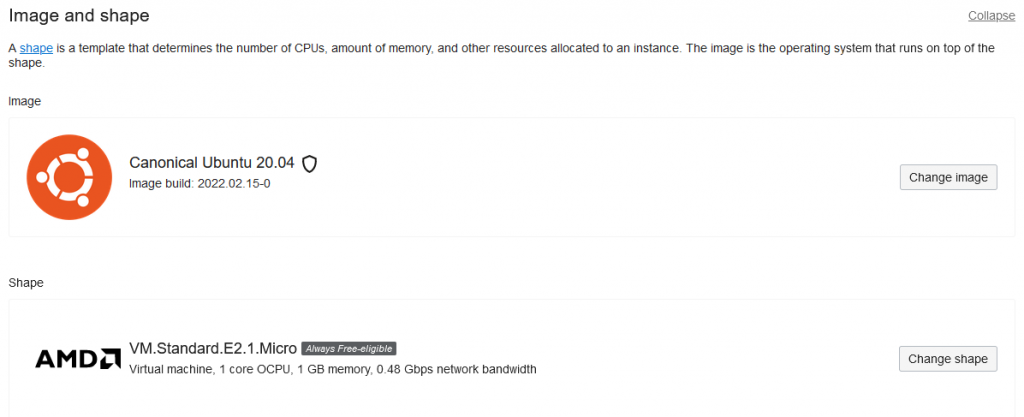
Select Operating System
Next, chose an operating system for the virtual machine such as Ubuntu or Oracle Linux. You can also select the operating system version that you prefer.
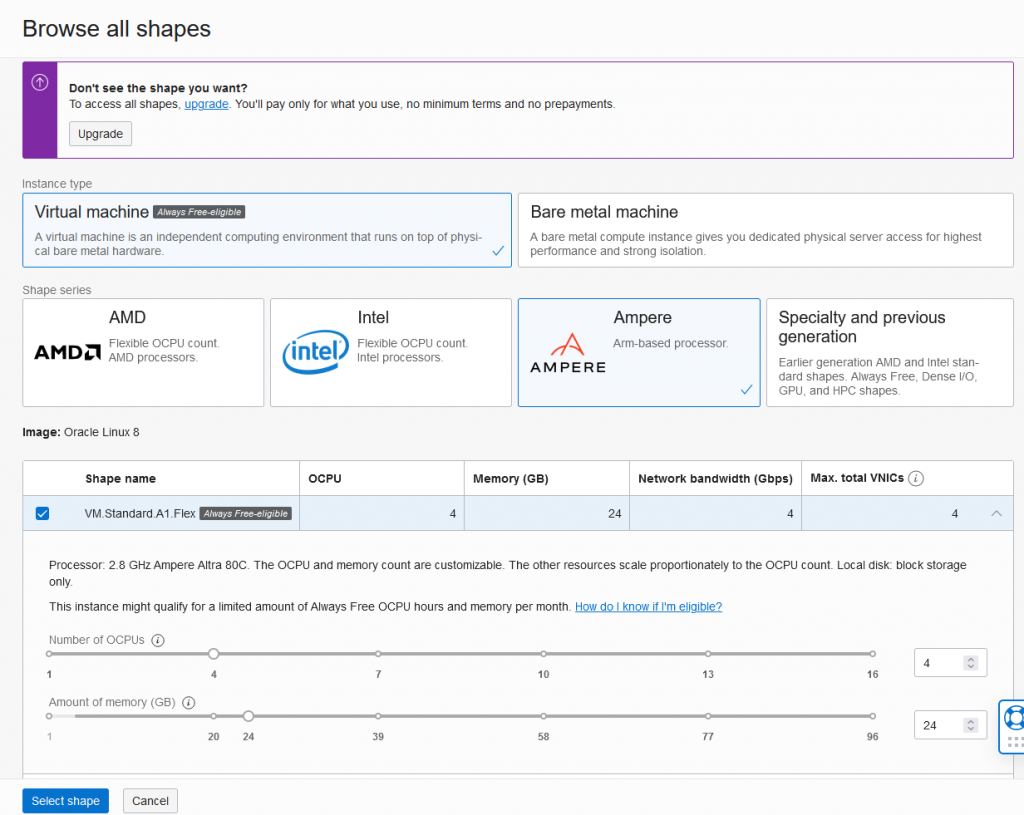
Select CPU type, Number of CPUs and amount of memory
Now, chose a ‘shape’ for the VM. The ‘shape’ of the VM is the CPU type, number of CPUs, amount of memory and other resources. Choose one of the two always free eligable shapes:
- VM.Standard.E2.1.Micro (AMD VM, 1 CPU, 1 GB memory)
- VM.Standard.A1.Flex (ARM VM, up to 4 CPUs, up to 24 GB memory)
If you select the ‘VM.Standard.A1.Flex’ shape then you can adjust the number of CPUs and amount of memory.
Networking Settings
Next, expand the networking section and select ‘Create new virtual cloud network.’ Check that ‘Create new public subnet’ and ‘Assign a public IPv4 address’ are also selected.
Add SSH Keys
Now we need to add SSH keys. These are used when connecting to the virtual machine from your computer.
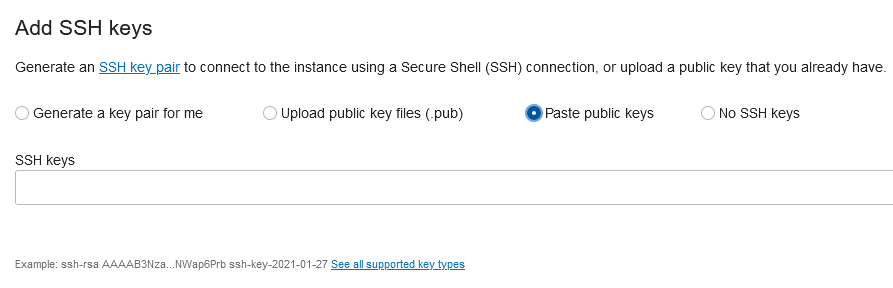
You can either leave ‘Generate a key pair for me’ selected (and download the private and public key) or use a tool such as PuTTY‘s PuTTYgen to generate the keys. See this guide for creating an SSH key pair with ssh-keygen or PuTTY Key Generator. If you generate the keys using PuTTYgen, select ‘Paste public keys’ and paste in the generated public key.

Finally, click create to create the VM.
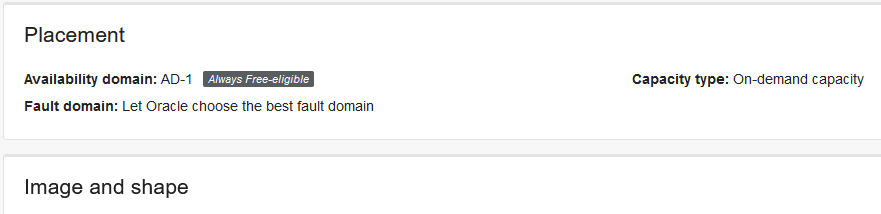
If it does not succeed in creating the VM, it may be because you need to change the ‘availability domain’ in the Placement section.
Connect to your Cloud VPS Server
After the VM is created you will be taken to the instance details page for the VM. We can start, stop and reboot the VM from this page. Once the VM status is ‘running’ we can connect using a Secure Shell (SSH) connection.
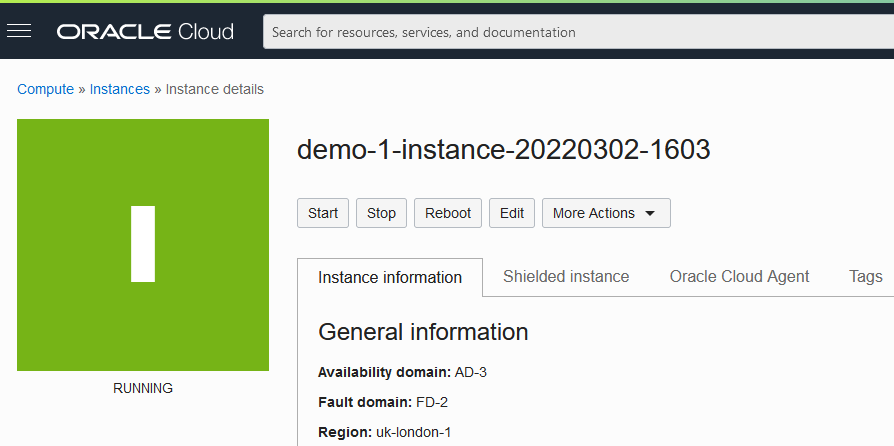
Under ‘Instance access’, copy the public IP address and take note of the username. The default username will likely be ‘ubuntu’ or ‘opc’.
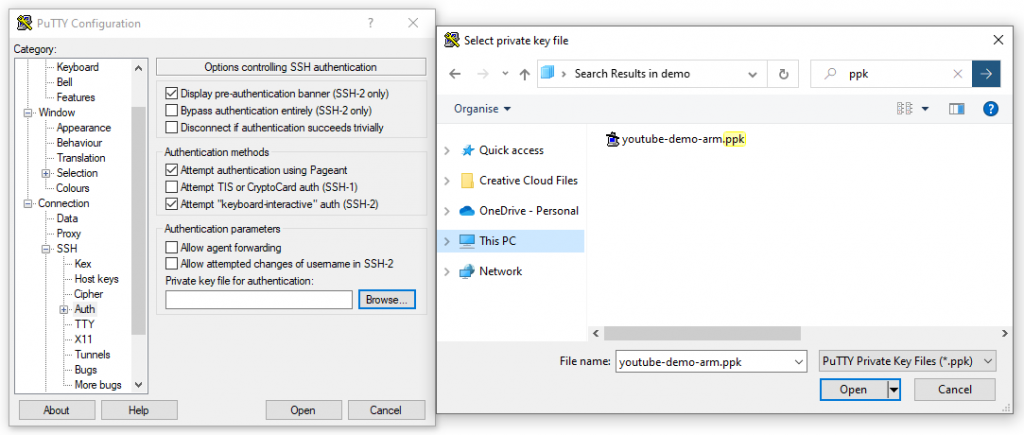
We’ll use PuTTY to connect to the VM, but you can use another SSH client if you prefer.
Open PuTTY and paste in the copied public IP address for the Host Name.

Next, expand the ‘SSH’ menu item under ‘Connection’ and click on ‘Auth’. Under ‘Authentication parameters’, click browse and select you private key file.
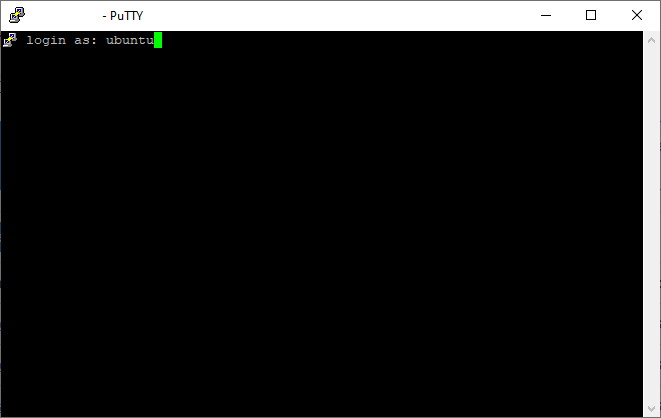
Now click ‘Session’ from the menu to go back to the basic options. Click the ‘Open’ button to connect.
In the terminal window, enter the username and hit enter.
What can I use my Free Cloud VPS Server for?
There are many uses for your cloud VPS server including:
- Create a web server and WordPress site
- Create a game server for Minecraft or CS:GO
- Create a web radio station using AzuraCast [Part 2 – Stream to YouTube]
- Install FFMPEG and create a YouTube live stream
📝Article last updated on February 12th, 2023